The Topton N1 NAS: Brian's thoughts on a Toaster!
I have been selling the Topton N5105 NAS Motherboard on eBay for quite a few months now. The manufacturer of the motherboard has sent me a couple product catalogs full of all sort of interesting products based around this (or similar) small form factor motherboards.
In this catalog, the Topton N1 NAS caught my attention for its price (under $200) and its features:
- AMD 300U PRO CPU
- 2 x DDR4 DIMM SO-DIMM slots (up to 32GB)
- 2 x 3.5” (or 2.5”) Hard Drive Bays
- 1 x m.2 NVME SSD

Instantly, I thought this little NAS enclosure was perfect for a few NAS-related projects that I had coming up: my off-site NAS that’s sitting at Pat’s house or the DIY NAS: EconoNAS 2023.
A couple of months ago when I restocked my inventory of motherboards, I also ordered one of the Topton N1 NAS so that I could evaluate it, consider it for my two projects, and also decide if I wanted to start selling it in the briancmoses.com eBay store.
- The Topton N5105 and Brian Moses’s DIY NAS Build for 2023
- I Am Excited About the Topton N5105 Mini-ITX NAS Motherboard!
- The Topton N5105 and Jonsbo N1 Are An Awesome DIY NAS Combination!
First impressions of the Topton N1 NAS
My initial impressions were very positive. At under $200, it’s a fantastic price for a 2-bay NAS. It features a CPU, the AMD Athlon PRO 300U, which is power-efficient (15W TDP), has a base clock of 2.4GHz, and a maximum boost clock of 3.3GHz that compares fairly well with the Celeron N5105 CPU. Of the two CPUs, I prefer the Celeron N5105 because it is newer, has more CPU cores (4 vs. 2), and is more power-efficient (10W TDP vs 15W), but the Celeron N5105 carries a heftier price tag too. I bought the barebones Topton N1 NAS (motherboard, case, and power supply) for less than I’ve been selling the Topton N5105 NAS Motherboard for on eBay.
Unboxing and Assembling the Topton N1 NAS
Unboxing the Topton N1 NAS was about what I expected. Most of the case is made out of plastic. The case is well thought out, but while disassembling it, I was more than a little concerned that I might break something if I was too brutish in handling it. I wound up completing the NAS by installing 32GB of DDR4 RAM, an Intel Optane 16GB NVMe SSD, and a pair of renewed Western Digital Ultrastar DC HC530 14TB hard drives. When I was re-assembling the case, I wondered if all these plastic bits would rattle when the hard drives were active.
Like a lot of the other Topton offerings, the product listing warns:
DO NOT buy Barebone (“No Ram No Storage” bundle)If you are NOT IT hardware technician. Please check video, PC demands professional skill to assemble and debug. Barebone bundle must use Samsung, Micron etc ORIGINAL brand ram and storage. Please DO NOT open dispute if you buy barebone.

Having built a lot of PCs over the years and quite a few DIY NAS builds, I didn’t find disassembling or reassembling this case to be that difficult. But this warning is somewhat ominous-sounding. If you’re hoping for some kind of support after buying the product, you may want to buy one of the fully assembled variants available.

Installing TrueNAS SCALE and using the N1 NAS
My biggest worry about the N1 NAS was that there would be some sort of obscure hardware that wasn’t supported under TrueNAS SCALE, but I had SCALE installed and functioning without any issues on the first boot. I created a pool made up of a single mirrored vdev using two Western Digital Ultrastar DC HC530 14TB hard drives.
This resolved my biggest concern about the N1 NAS: hardware compatibility. I was worried that there’d be some obscure hardware in the machine that either wasn’t supported by Linux or required a newer Linux kernel than what shipped with TrueNAS SCALE 22.12.3.3. At this point, I was fairly convinced that it’d be able to be at least a very basic DIY NAS. Had I not already set up my off-site NAS at Pat’s house, I would have been very tempted to use this N1 NAS instead.
I had purchased a total of four of the renewed Western Digital Ultrastar DC HC530 14TB hard drives. I have a few high-mileage drives in my personal NAS, and I wanted to have some drives on hand to use with my DIY NAS builds and as replacements for any drives that failed in my primary NAS. Because these new drives were all renewed, I used the N1 NAS to burn in the hard drives.
Once I had some confidence in the hard drives, I created an encrypted pool made up of a single mirrored vdev. I created an encrypted dataset, named media. Then I set up a TrueNAS replication task to sync my media collection from my personal NAS. I didn’t actually need to do this, but I wanted to put the N1 NAS and two of my “renewed” hard drives to work.
The replication task instantly saturated the Realtek Gigabit network interface. The replication started in the early evening and the task completed overnight.

Is this Toaster NAS a literal toaster?
While I was burning in my four hard drives, I kept an eye on the TrueNAS reporting and saw that the temperature of one of the drives was a little high (~52* celsius) and the other was a bit more normal (~43* celsius). Normally, when it comes to PC hardware temperatures, I am not nearly as concerned as most people you’ll read talking about such things. Very broadly speaking, I don’t worry one bit about temperatures that are within the specifications. The datasheet for the drives I’m using says the operating temperature should be between -40* and 70* celsius.

Personally, I wouldn’t be that worried, and I’d keep using these drives without any concern. But if you’re more sensitive to your hard drives’ temperatures, then I have a couple suggestions:
- Use 5400 RPM hard drives instead: I have an old 2TB 5400 WD RED drive. I replaced my 7200 RPM Ultrastar DC HC530 with this 5400 RPM drives and repeated the same tests. It ran at least 10 degrees cooler than my 7200 RPM drives.
- Improve the airflow: I personally thought about 3D-designing a new bottom piece which would allow me to add a fan to push more more air through the N1 NAS. But something like this cooling fan “stand” would probably help solve this so-called problem.
The temperature of one of the drives is definitely a little warmer than the other and also a bit warmer than you’d see in any of my other DIY NAS. But I didn’t think the drive temperatures were warm enough that I designed a solution, like I did when I created a cooling duct for the SilverStone DS380B case.
The Bad News
I was really excited about the N1 NAS and I was ready to feature them as this year’s EconoNAS! I wanted to buy a bunch and resell them in my eBay store. But each time I’ve talked to Topton, these are out of stock, and I don’t believe that they’re going to be restocked. I ended up going in an entirely different direction with the DIY NAS: EconoNAS 2023, and I’m excited how that turned out, but I’m a bit disappointed that I had to go down a different path.
Do you like the Toaster NAS? It’s not all bad news!
I like this NAS; I’d recommend it for anyone who was looking to to put together a small and inexpensive DIY NAS where the hardware is already assembled for you. If you shop on Aliexpress, they sure seem to be available. Just because I can’t buy and resell them doesn’t mean that other vendors don’t have inventory they’re looking to move.
You can buy my Toaster NAS!
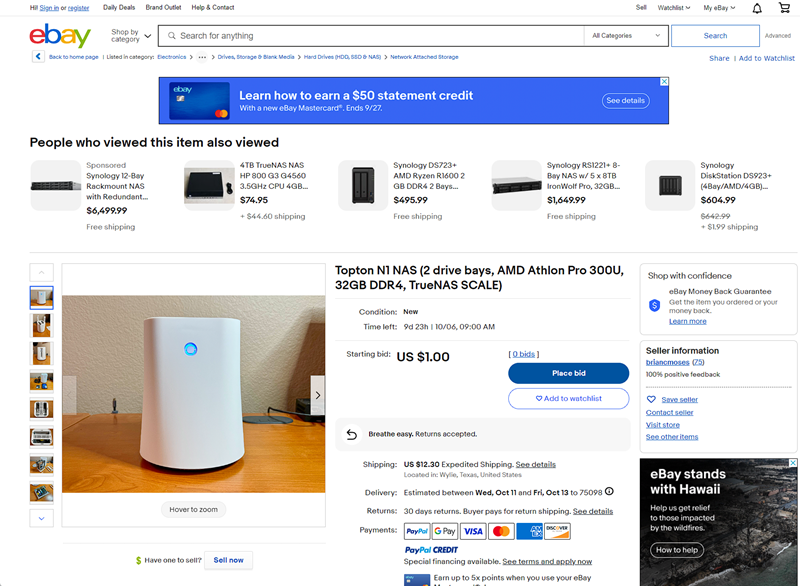
While I’m not going to be stocking and selling the Topton NAS N1 on my eBay store, I will be auctioning this one that I’ve used for this blog in a no-reserve auction on eBay. It’ll come with the hardware I described above and preloaded with TrueNAS SCALE. If you’re an early reader of this blog, you have an opportunity to get in on the bidding. The auction began the day this blog was published (9/26), will run for 10 days, has a starting bid of $1.00 USD and is a no reserve auction!
There’s a much better Toaster NAS out there, the Topton NAS N1 Pro
If you’re willing to spend about twice as much, there’s a replacement for the NAS that I reviewed: the Topton NAS N1 Pro. While it may be twice the price, its features justify its price:
- AMD Ryzen 5 5500U CPU
- 2x SO-DIMM DDR4 slots (up to 64GB)
- 2x M.2 NVME slot
- 2x Drive Bays
- 2x 2.5Gbps Inteli i226V Network Adapters
It’s the same amount of hard drive storage options, supports up to twice the RAM, comes with a much faster network adapter, but winds up right around twice the price of its predecessor. It’s more expensive, but you definitely get what you pay for. I think it is a really good option—I just think it’s a tad bit expensive for what I wanted to use it for: an off-site NAS or the EconoNAS.
If you’re interested in spending around $400 on a DIY NAS, you should definitely check out the DIY NAS: EconoNAS 2023. Assuming that you’re willing to invest some time into building it, it’s a much better NAS for this price point.
Conclusion
What do you all think? Are you like me and wish that the Topton N1 NAS were in stock? Does the Topton N1 PRO NAS appeal to you more? Or are you like me and you’d rather build the DIY NAS: 2023 EconoNAS? Join us in the #diynas-and-homelab channel on the Butter, What?! Discord server and tell us what you think!