Brian (and Pat) Built DIY Acoustic Panels
When we moved into our house a bit over a year ago, I promised my wife that I’d stop hijacking the kitchen table for my video recording and photography studio when capturing digital media for my blog if I could use one of the bedrooms for that purpose. Because my wife is amazing, she said yes, and she didn’t even get too upset when the kitchen table was hijacked for quadcopter repairs and spare parts. My recording studio’s not the biggest of rooms, but one of the things that I worried about was the amount of echo there was in the room.
To address that worry, I wound up buying a few inexpensive moving blankets and draped them across one of the walls of my studio using a variety of ladders and other tall things from my garage. This solution seemed to work well enough. My video about the DIY NAS: 2019 Edition was one the first videos that I recorded in the studio. There’s a distinct amount of echo in the audio that I was never very happy with.
But between the ladders, moving blankets, tripod, lighting stands, and my table, there was barely any room to move around. On one occasion, all the clutter caused me to be even clumsier than I normally am, and I almost tipped over the table as I caught my own balance. I ultimately decided that my solution just wasn’t working out, it was taking up way too much room, and it wasn’t even getting rid of all of the echo.
I asked myself, “How much worse could it get if I took down my crude sound dampening?” That question was quickly answered in my next two videos: one about the unboxing of the August FPVCrate and another about shucking a Western Digital Elements external hard drive.
I was pretty disappointed with those two videos! I’d worked pretty hard in improving my video-recording capabilities by adding a new stand to record top-down videos and using a Zoom H1n portable microphone. What I expected was the content to get better, but what I found was that it got worse, much worse. I definitely needed something in my studio to dampen all that echo!
DIY Acoustic Panels
Ultimately the problem with my recording studio is that it is nothing but flat surfaces; there’s just not much sound absorption going anywhere in the room. I took a little comfort in knowing that my moving blankets had actually helped way more than I gave them credit for, but they weren’t a very effective use of floor space. I decided that what my studio needed was something that I could hang on all of the walls. I was going to need some sort of acoustic panels.
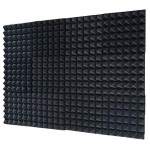 I originally started perusing what Amazon had to offer, interested by likes of the Acoustimac DMD 6-piece pack, the ATS Acoustic Panel, and even just lining a wall or two with Acoustic Foam Panels. But ultimately I had concerns about their cost, how effective they’d be, and what I’d do if I ever had to turn the studio back into a bedroom.
Anytime something seems a little too expensive, I set out to Google and YouTube to determine whether a do-it-yourself solution exists and whether (or not) I can repeat that solution. In this particular case, I found the DIY Perks channel on YouTube had two different videos on the topic: How to Make High-Performance Sound-Absorption Panels for $5 and High-Performance DIY Acoustic Panels (Build Guide)
I liked elements of both videos. I especially liked that the panels actually wound up pretty stylish in his second video and added some dimension to his interior design. In fact, in considering my own panels, I realized that this was an opportunity to easily address something I didn’t like about my studio: it was pretty boring to look at.
After watching these two videos, I figured I could build something comparable to what I’d seen on Amazon, build it a bit cheaper, and make my studio a bit more interesting to look at all at once. That same weekend, I went to the local mega hardware store and picked out materials. When I got home from the store, the amount of money I was saving encouraged me to splurge on something I thought would add a bit of pizzaz.
Parts List
- 8 of 16” x 48” x 2” rolls of multi-purpose insulation ($5 a roll at the hardware store)
- 16 of 1” x 2” x 8’ framing-grade lumber ($1 each)
- A set of king-size bed sheets which kind of matched my website’s navigation bar ($24)
- 2 packages of 1.75 ounce 16 x 1 1/2” Wire Nails (~$4)
- 1 package of #6 x 1-1/2” Wood Screws ($7)
- A whole mess of 1/2” staples
- 32.8 feet (10M) of programmable RGB LED (300 LEDs) strip lighting ($35)
- A bunch of repurposed cardboard boxes
Assembly
The lumber that I bought was extremely inexpensive but also terribly low quality, with none of the pieces being very straight at all. But since the entire plan was to cover the frame up with the fabric, I was excited to save some money on the lumber. We cut the frames to be 16 inches by 48 inches to hold the insulation. We screwed the frame together using the wood screws, then cut and stapled cardboard to the backside of each frame, loaded the insulation, and then wrapped each acoustic panel with material cut from the bed sheets and stapled that through the cardboard too. We used some of the leftover lumber to cut small squares, we drove one wire nail through a corner of that square and then used two more nails to tack it down to the frame. This way, each corner of the frame had its own nail poking out that could be used for mounting it to the wall. Lastly, I used some black duct tape to tape down all the fabric that we cut off to make the backs of the panels look nicer.
Ignoring the LEDs, the cost for each panel was around $12.00 of raw materials, which I thought compared quite favorably to the $35-55 dollars per panel I was finding on Amazon for similar products.
Backlighting the Acoustic Panels
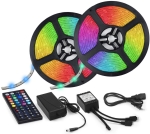 I think that the tan wall behind me in my videos is pretty dull. I’ve been brainstorming some ideas to spruce it up a little bit and hadn’t quite settled on anything. Mostly, I’d been thinking about painting it another color and maybe hanging a couple pieces of artwork and a trinket or two to spruce it up a bit. When I decided that I was making some acoustic panels, I thought to myself, Why don’t I find a way to spruce it up using the panels somehow? I decided to accomplish that in two ways; picking a color of fabric that kind of matches my navigation bar on my website and, more importantly, buying the 4 strips of programmable LED lights to backlight the panels.
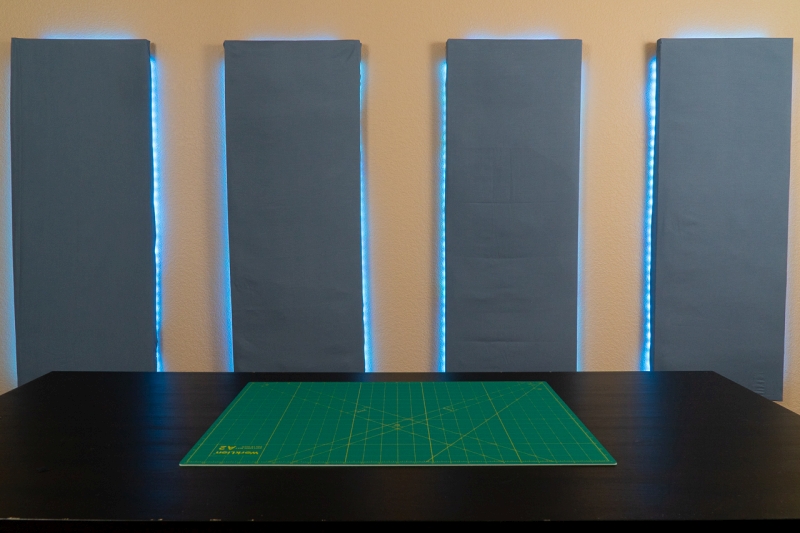
What I gambled for was that the new backlit acoustic panels would be enough of a splash of color to offset the dreary tan wall behind it. But I became a bit concerned that the crazily inexpensive bright LED bulbs that Pat found and recommended would wash out the brightness from the LED backlighting, but in the end I think it worked out about perfectly. What do you think?
What I’d do differently
Having completed the project, I have a few things that I’d probably consider doing differently. While I’m really excited with how everything worked out in the end, I’m pretty certain these few suggestions would’ve resulted with an even better end product:
- Run the fabric through the washer and dryer: The sheets that I used to cover each of the panels with went straight from the packaging to being cut and stretched around one of my frames. As a result, there were quite a few creases to be found in the sheets, and those wrinkles ultimately found their way to my walls. A trip through the washer and dryer would’ve cut those wrinkles down dramatically. However, this is tremendously nitpicky–once the video was finished being processed by Youtube, those wrinkles were encoded and compressed out of existence.
- Buy better lumber, maybe: In the end, this was probably my biggest savings when buying materials but also my biggest disappointment. My crude carpentry wound up with a number of these panels being absolutely the opposite of square. Spending nearly 4 times as much on lumber would’ve probably made them quite a bit more straight in all the dimensions.
- Stretch the fabric and staple it to the inside of the frame, not the back: I actually wound up putting the fabric on last, stretching and stapling it to the cardboard on the back of the pabel. As a result, I had a hard time pulling the fabric as taut as I would’ve liked. It also led to a bunch of ugly scraps of fabric from my hasty scissor cuts on the back of the panel. Stretching the fabric taut, stapling it to the inside edge of the frame, laying down the insulation, and then stapling the cardboard to the backside of the frame would’ve been a much better way to go.
- DIY LED Lighting: Rather than buy an out-of-the-box kit, I probably would’ve done something clever like build my own ESP8266 to control some NeoPixel LEDs.
How’d I do?
When I set out to do this project, I had a few goals in mind:
- Cut down the echo in my studio.
- Do it inexpensively
- Spruce up the boring tan wall behind me.
- Do it (mostly) myself.
Ultimately, I think my most recent video about unboxing the September 2019 FPVCrate is hands down my best video to date. The panels cut down on the echo from my previous videos tremendously. I built the acoustic panels inexpensively enough (about $12 per panel), so I decided to get even fancier and add LED backlighting to the 4 panels that would be appearing in my videos. The LED backlighting and panels behind me add some interest to my dreary tan wall. And with a healthy amount of help and assistance from a friend, I was able to do this mostly by myself.
I hope in the near future, I’m helping Pat build his own recording studio in the laboratory he’s constructing in his own home. What things should we do differently when we build acoustic panels for Pat’s lab?