Show Me Your DIY NAS: Jim W.'s 100TB In-Progress NAS
Across the years of all my DIY NAS builds, I’ve had a few people leave comments in the blog, send me emails, direct messages, and other forms of communication asking me what I thought about their DIY NAS. I’ve always appreciated hearing how people have tackled the same kinds of problems that I wanted to tackle with my own NAS builds, and I’ve always really appreciated seeing how people’s different preferences have wound up creating different solutions.
I think Butter, What?! is the perfect place for me to talk about these reader-submitter DIY NAS blogs, so I’ve been clamoring with my followers to submit their own DIY NAS builds:
One of my projects on https://t.co/v10bSV9F45 is to write blogs about reader-submitted #DIY #NAS builds. Got a NAS that you'd like to show off? Shoot me an email (brian at briancmoses dot com) and tell me why you built it, what parts are in it, and a few photos! pic.twitter.com/9KgmJvl7O0
— Brian Moses (@briancmoses) July 7, 2019
Just this weekend, I got a new DIY NAS submission on my blog’s Facebook page from Jim! The morning after his submission, I sat down with a cup of coffee and started poring over Jim’s parts list! Exactly like I did with Sam’s 48TB Node304 NAS I quickly got started putting together a quick little blog about what was submitted.
Jim’s In-Progress 100TB NAS
Jim W. posted a few pictures and some comments in response to one of my posts on my blog’s Facebook page asking for DIY NAS submissions. From what Jim’s described, this is in process of being assembled as he shared it, but a couple aspects jumped right out at me and I wanted get a blog written about it and shared up on Butter, What?!. Hopefully Jim keeps me in the loop as this nears completion and I can post a few updates on it!
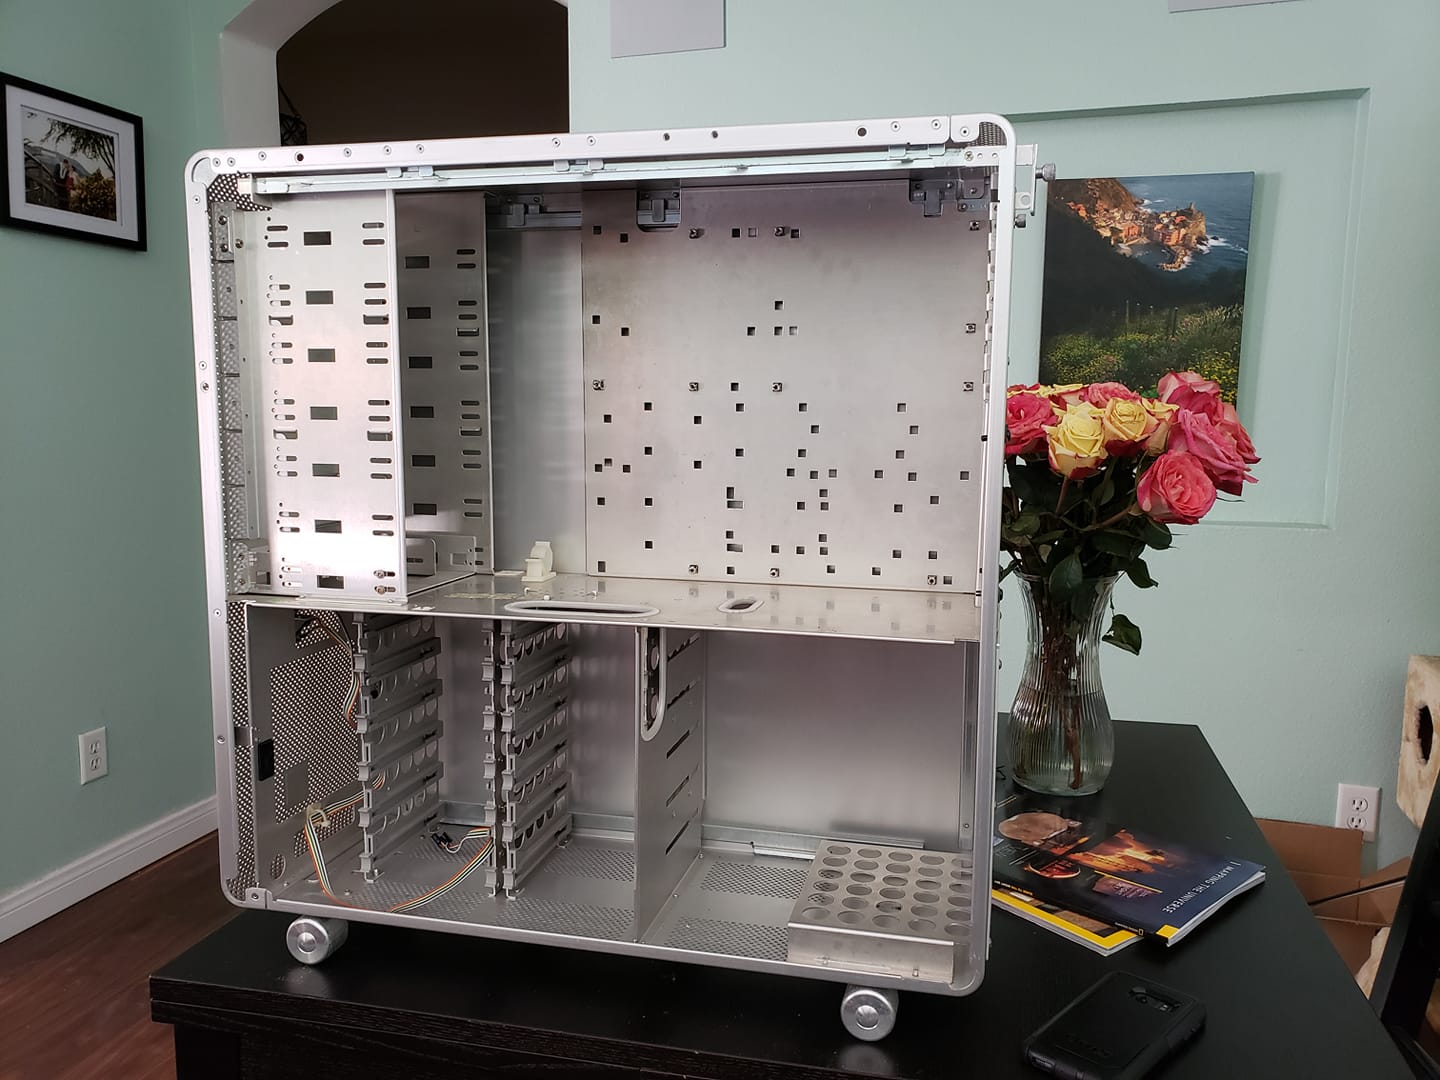
- Case: Lian Li PC-V2000
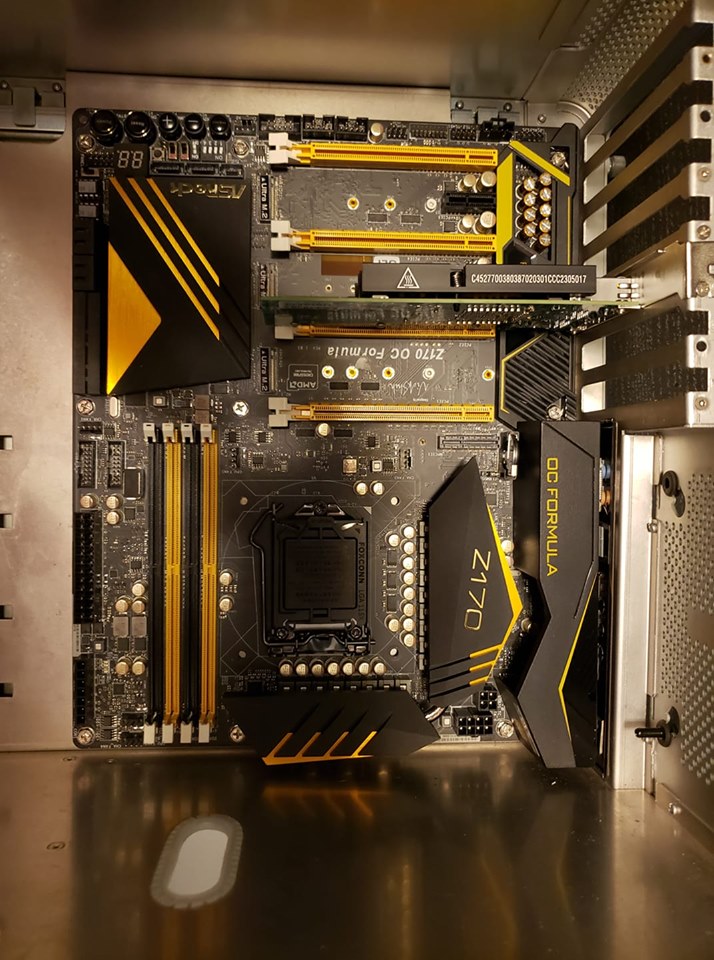
- Motherboard: ASRock Z170 OC Formula (specs)
- CPU: Intel Celeron G3930 (specs)
- RAM: 2 x G.Skill 32GB (2 x 16GB) Ripjaws V Series DDR4 PC4-19200 (specs)
- HDDs: 10 x shucked Western Digital Easystore 10TB External Hard drive
- Host Bus Adapter: LSI 9211-8i
- Network Adapter: Intel X540-T2 Dual 10Gb (specs)
- Power Supply: EVGA 650 Watt 80+ Gold PSU
- Drive Caddy: 2 x Supermicro CSE-M35TQB 5-in-3 Hot Swap SAS/SATA Mobile Rack
In describing his NAS and listing out the hardware, Jim stated that he’s got a few goals:
- 1GB/s file transfers in both directions.
- Edit 4k/30 FPS GoPro video in real time.
- Highspeed Photoshop scratch disk for gigapixel image stitching.
What do you all think? Will Jim achieve his goals with what’s he currently building?
What’s Brian Think?
A few thoughts popped right into my head when I saw Jim’s submission: “Wow, it’s big!” and “He’s using shucked drives!”
The size is pretty impressive, in nearly every regard. I love the amount of room in the Lian Li PC-V2000. There’s enough room in there that its square footage probably rivals that of my very first couple apartments in college. There are 12 3.5” hard drive bays internally, at least 7 external drive bays (1 x 3.5”, 6 x 5.25”), probably some that I’m overlooking, and definitely the available space to find ways to modify the case to add even more storage. The fact that you can most likely fit twenty (or more) 3.5” drives in there is pretty mind-boggling. The only drawback to this case for other DIY NAS builders would be that it appears to be out of production. I found a few sites listing it for sale, but I couldn’t even find it on Lian Li’s website. That’s bad luck for the rest of us, but Jim’s in good shape!
Jim’s indicated that he’s going to shuck ten of the Western Digital 10TB Easystore external hard drives. For those of you unfamiliar, “shucking” an external hard drive simply means taking apart the case and removing its hard drive for internal use. Typically what’s found inside the external drives are white-label versions of the same hard drives that the manufacturers are selling internally.
For some strange reason that I don’t quite understand, external hard drives are usually found considerably cheaper than their internal counterparts. As I understand it, the external drives tend to have shorter warranty periods than their internal drives, which might account for why they wind up being a better deal. Shucking a drive is not without risks–you’ll most likely wind up voiding any kind of warranty that you have on the product, it might be a pain in the neck to disassemble, and I’ve read cases where certain drives’ cabling is convoluted and requires further modification on your part.
I think shucking drives for a DIY NAS is an excellent way to put the “I” in RAID (redundant array of inexpensve disks), and I like that Jim’s gone all-in and plans to put 10 shucked drives into his own DIY NAS!
When Jim’s all done building it, he’s going to have a potent NAS. I predict when it is all said and done, Jim’s going to have a very good cost-performance ratio on what he’s buying. By picking a larger case, he doesn’t have to pay the premium for smaller components that I frequently do, and by sticking to shucked drives he’s going to reap a really big savings on what he winds up investing in his hard drives. I’m excited to hear more about Jim’s DIY NAS as it reaches its completion. And I’m also hoping to hear back to see if he accomplishes his goals–I think he’s well on his way!
Seriously, show me your DIY NAS!
I very much want this to be a regular thing on Butter, What?!. If you send me some specifications, photos, and a little bit of the backstory behind your NAS, I’d love to share it with the world and write a few of my thoughts about what you’ve built. Send me a DM on Twitter, a message to my blog’s Facebook page, send me an old-fashioned email, or swing by our Discord server and let’s get started showing off your own DIY NAS build!